Toys & Games › Learning & Education › Science Kits & Toys



Brand: Fulcra
Fulcra Hydraulic Robotic Arm STEM Kit, 4 Water-Powered Joints, Ages 8+
Title · 70 of 75 characters4 birch plywood sheets, 8 needle-free water pistons, 4 color-coded tubes, fill cup, spares, 10 challenge cards; no batteries
Item highlights · 124 of 125 characters$3499 (83 pieces)
In stock
Ships from and sold by Fulcra
- Brand
- Fulcra
- Item Type Name
- Hydraulic Robotic Arm Kit
- Material
- Birch Plywood, Polypropylene, Silicone, Nylon, Beech, EVA Foam, Paper
- Number of Pieces
- 83
- Power Source
- Hand Powered
- Assembly Required
- Yes
- Manufacturer Minimum Age
- 96 months
About this item
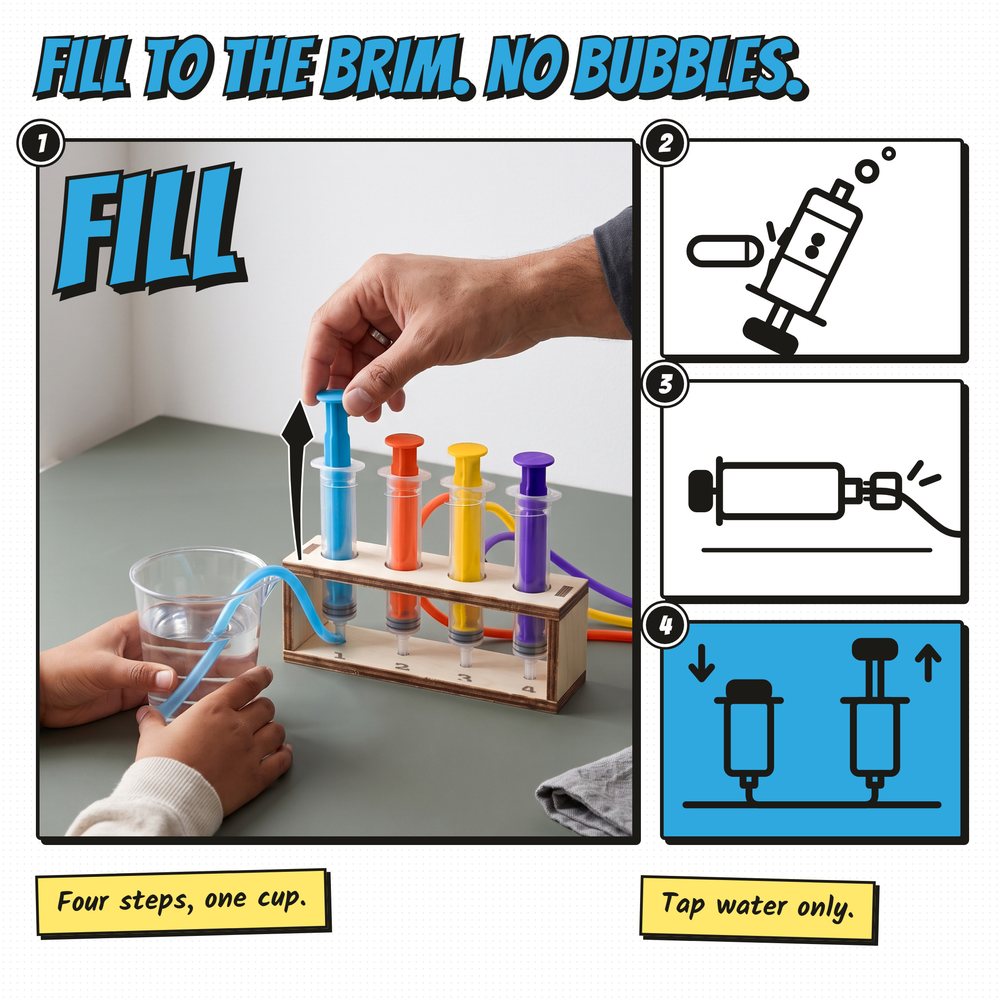
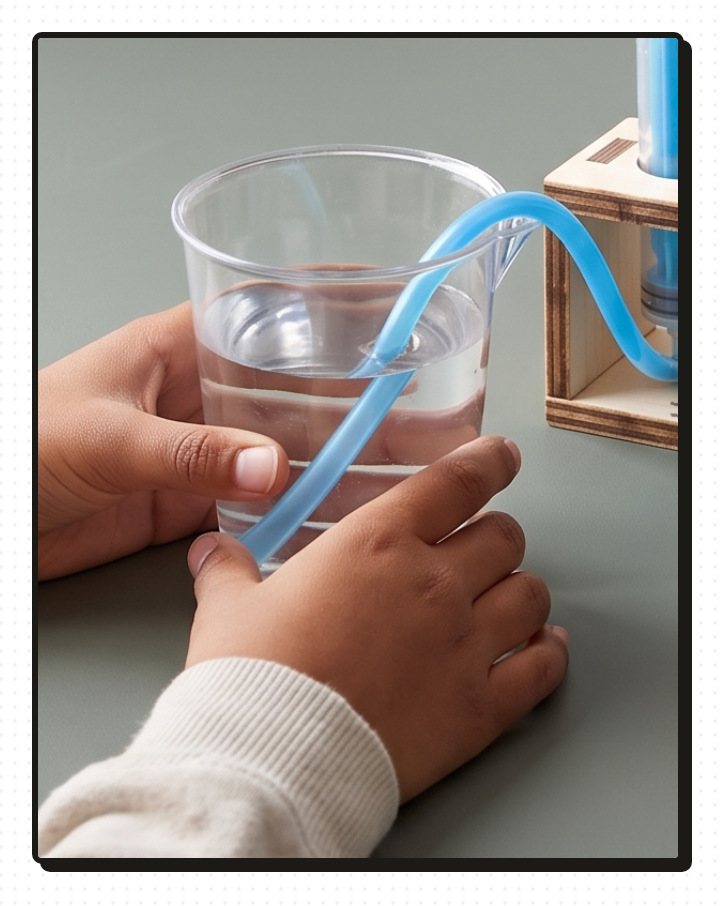
- WILL IT WORK, OR LEAK AND GO SPONGY: Fill each line under the water to the brim ring, tap the air out and test it on the table before it goes on the arm; a short stroke means air, a drip means the tube is not on fully; the booklet shows the fix
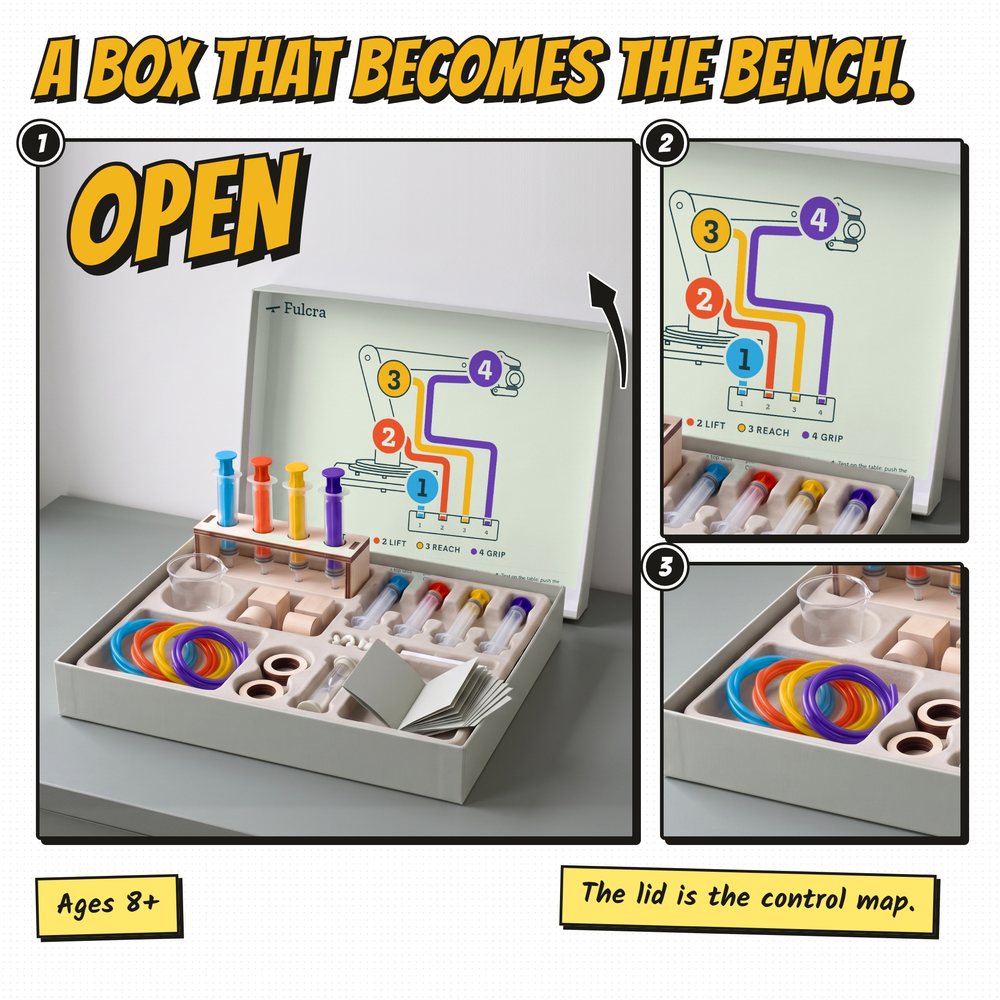
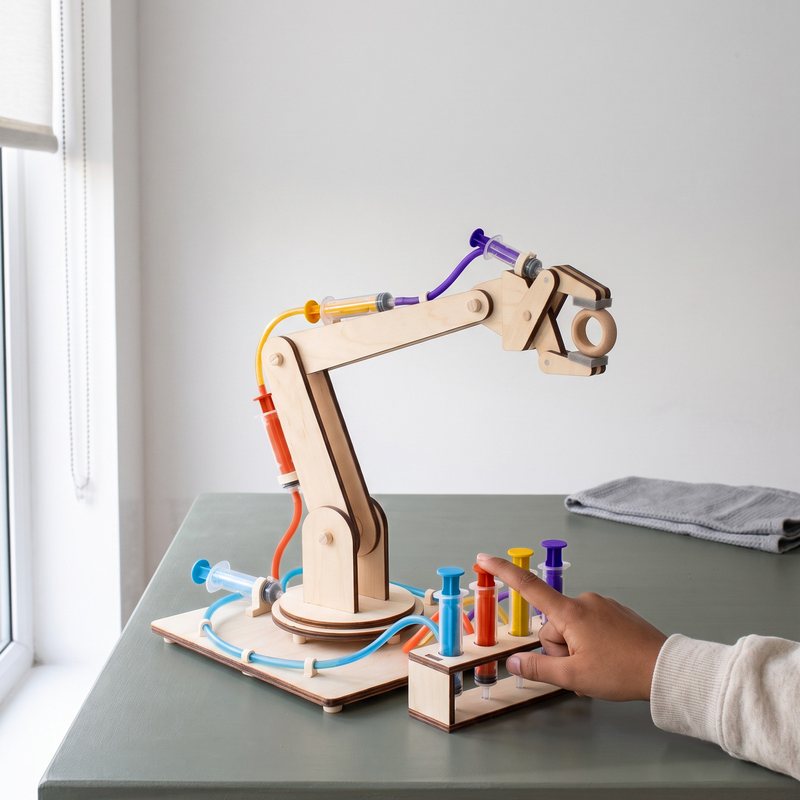
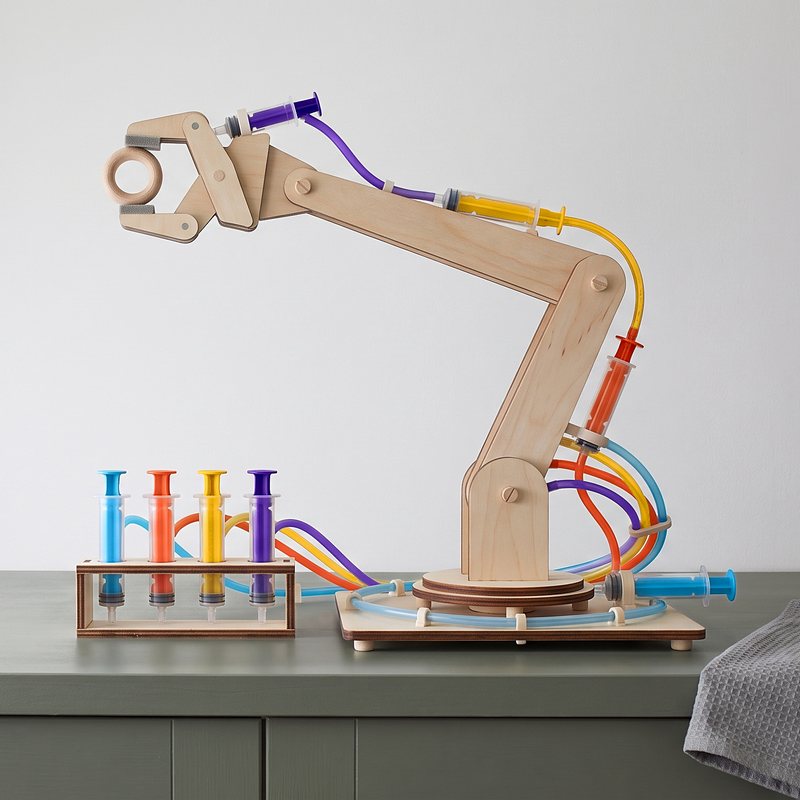
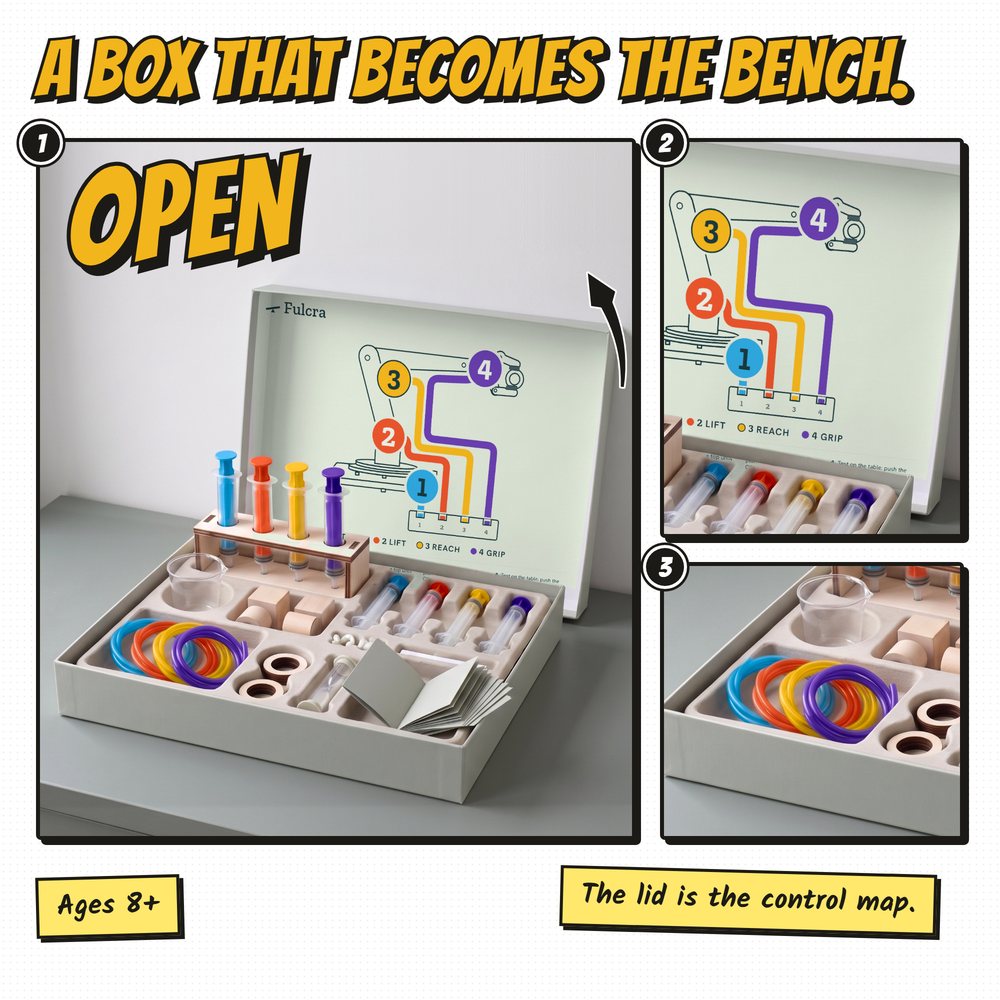
- WHICH COLOR MOVES WHICH JOINT: Line 1 sky turns the base 180 degrees, line 2 poppy lifts the boom, line 3 sun swings the forearm, line 4 violet closes the gripper; the lines are numbered 1 to 4 on the rack and on the sheets
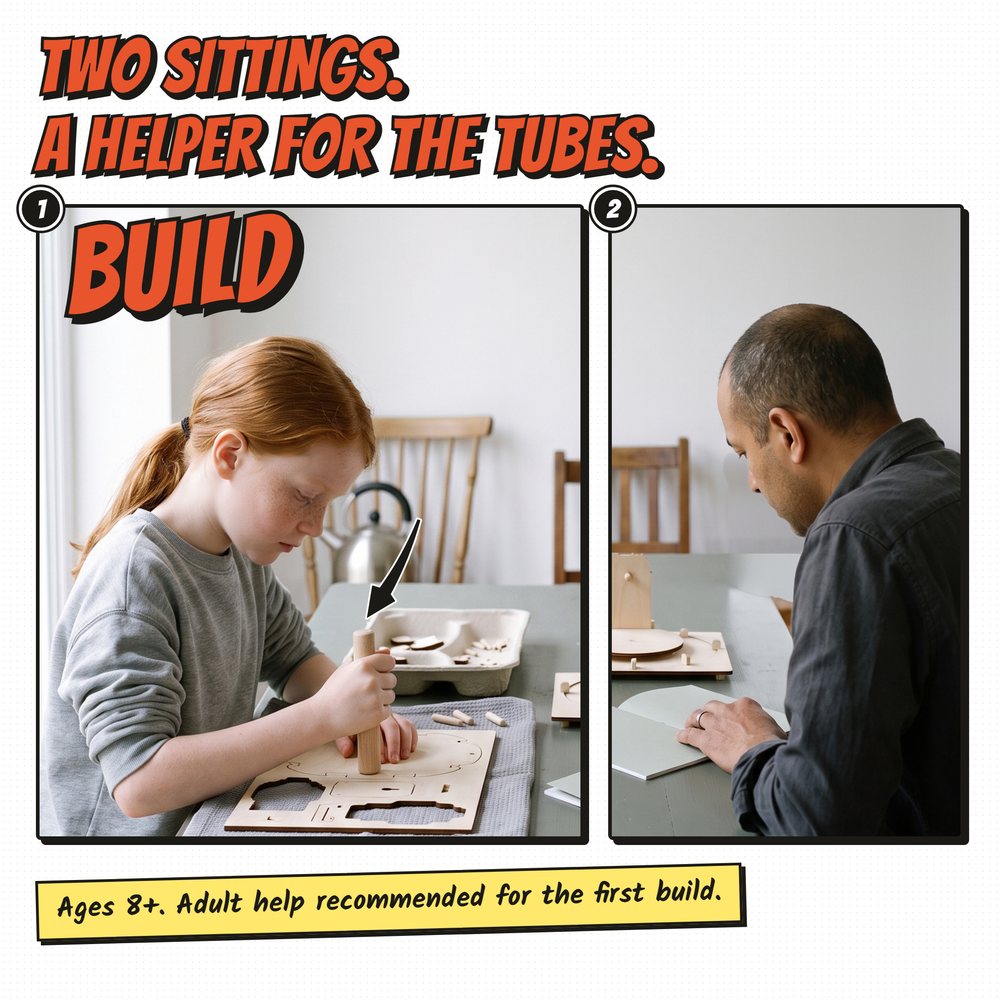
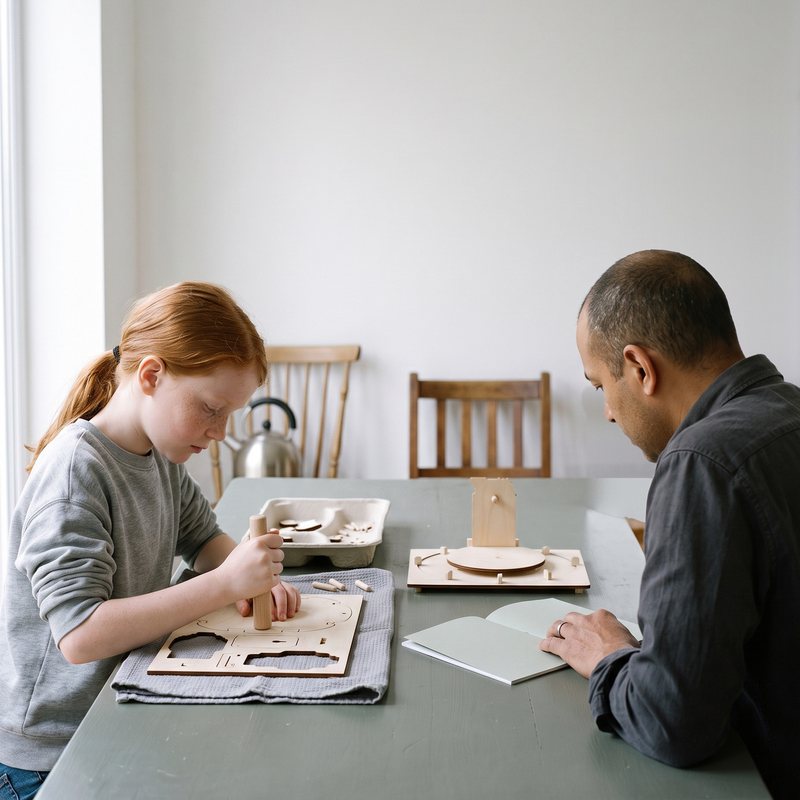
- CAN AN 8-YEAR-OLD BUILD IT, AND HOW LONG: Ages 8+. Two sittings: the base and the arm, then the pistons, tubes, fill and test; adult help recommended for the first build at the tube steps; no glue, no screwdriver, no batteries, just tap water
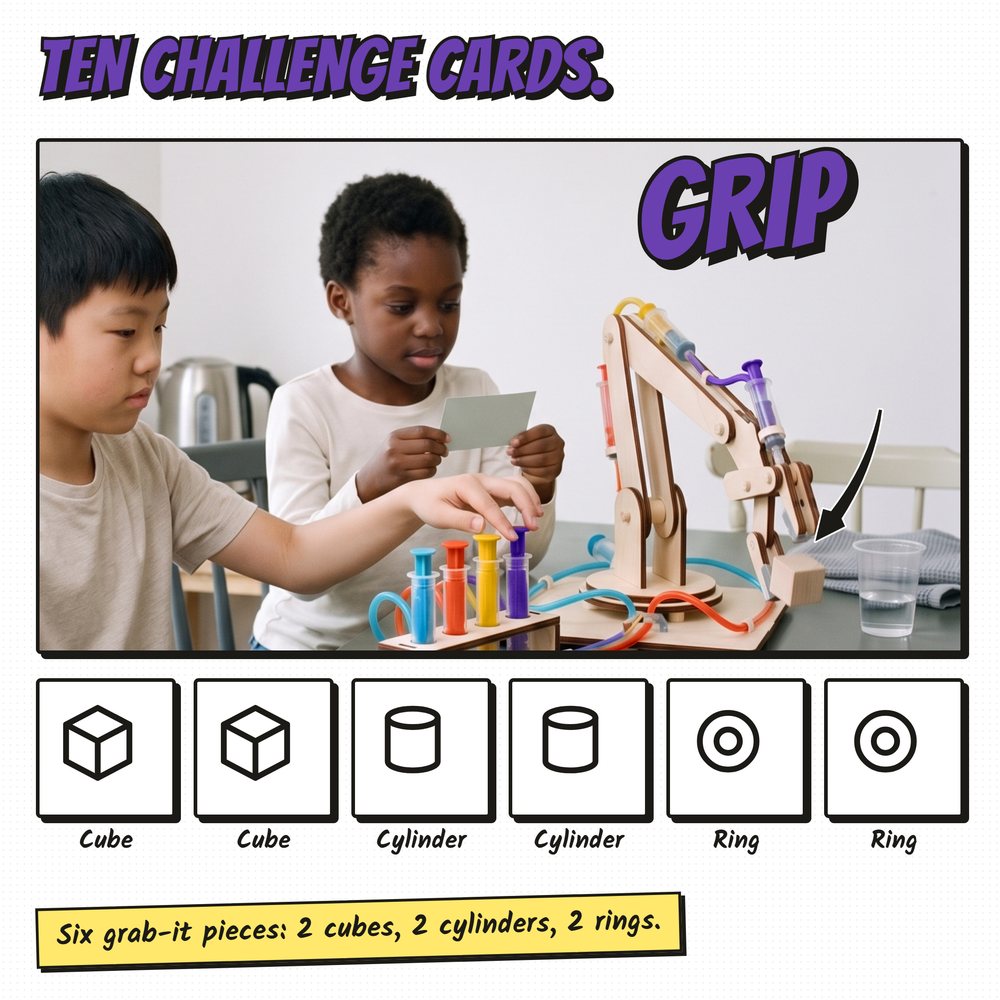
- WHAT CAN IT LIFT: The ring, the cube, the cylinder and an empty paper cup, yes; a clementine at mid-reach, yes; a full mug, no; more at mid-reach than at full reach, because the arm is a lever; card 10 asks the builder to weigh it on a kitchen scale
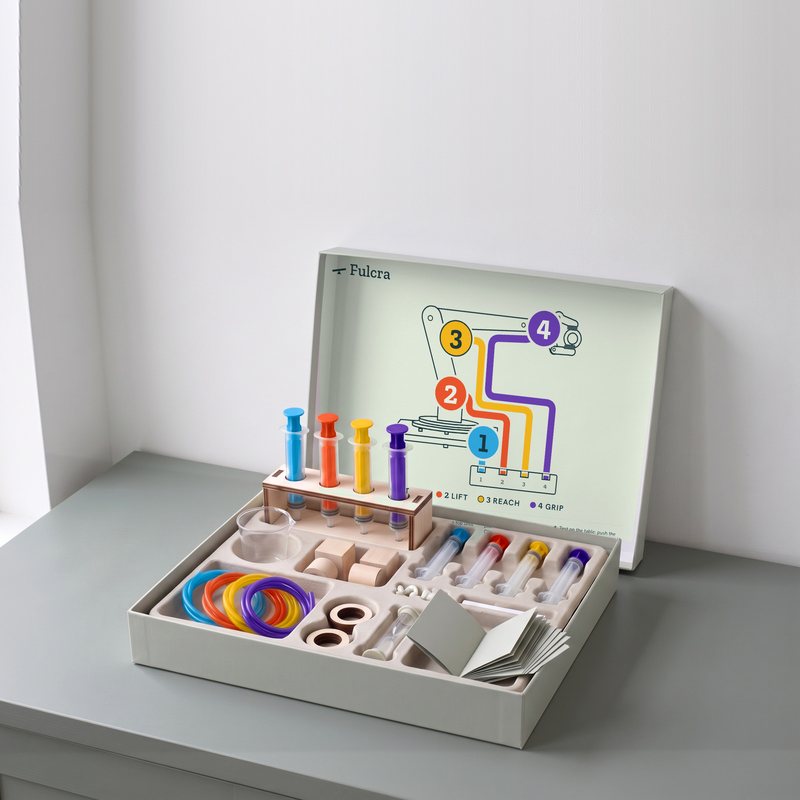
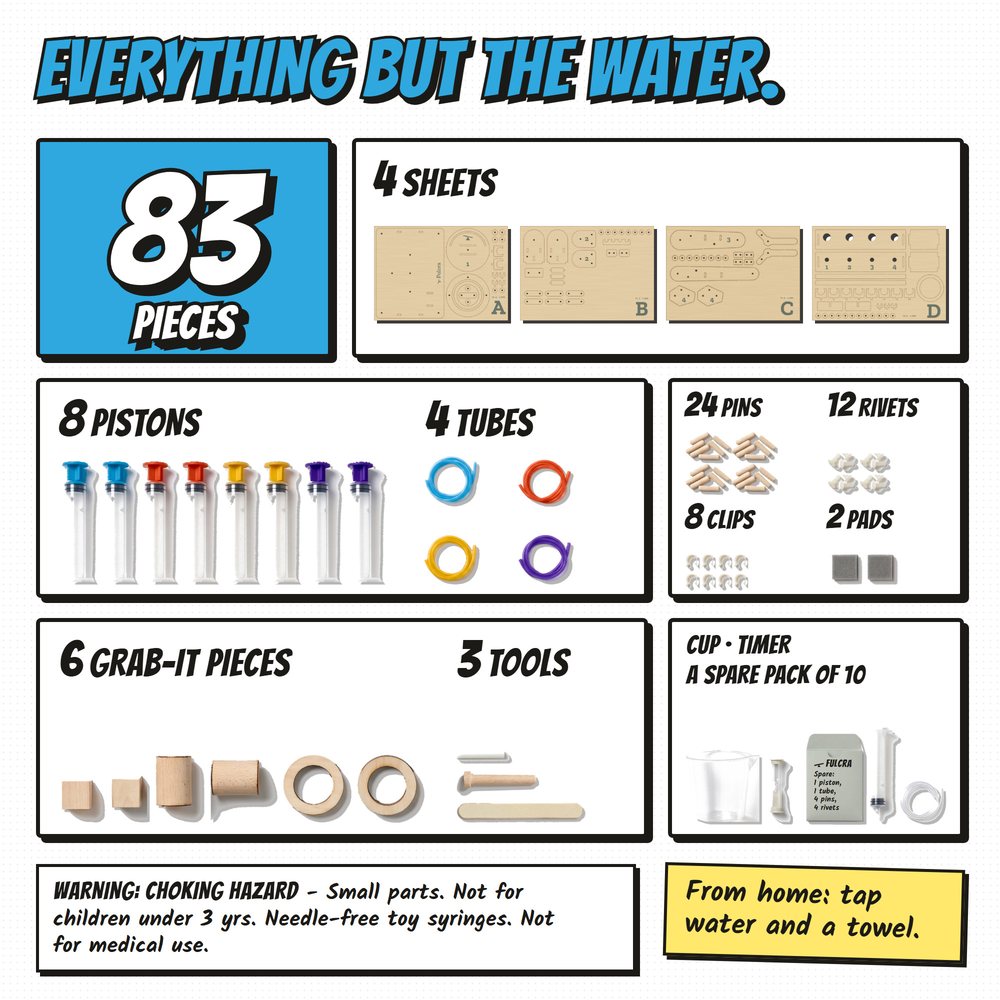
- WHAT IS IN THE BOX: 83 pieces: 4 plywood sheets, 8 water pistons, 4 tubes, 8 clips, 24 pins, 12 rivets, 2 pads, 6 grab-it pieces, 3 tools, fill cup, sand timer, spare pack of 10; booklet, 10 challenge cards; no batteries; from home: tap water and a towel
From the brand
Every joint is a fulcrum.
Fulcra began as a drawing: an arm with four joints, each one a pivot, each one pushed by water. We kept the drawing: its numbers are cut into the control rack, and the drawing is printed inside the lid, in the booklet and on every card, so a builder can look at the arm and at the drawing and see one thing. Then came a brim ring on every piston, a cup with a lip for filling under the water, a tray that catches drips, spares and a wax stick.

Why water?
Because you can see it work. A push at one end becomes a push at the other, along a tube you can follow with a finger. No batteries to run down, nothing to charge or wire, nothing hidden in a box.
Why four colors and four numbers?
So a child can say which control does what before touching it, and so the controls read without the colors: the lines are numbered 1 to 4 on the rack and on the sheets.
Why plywood?
Because the parts pop out of four flat sheets and pin together without glue, and because a wooden arm shows its joints. The boom and the fingers are cut from the 6 mm sheet, and a wax stick is in the box.
From the manufacturer
Module 1 · Premium Full Image
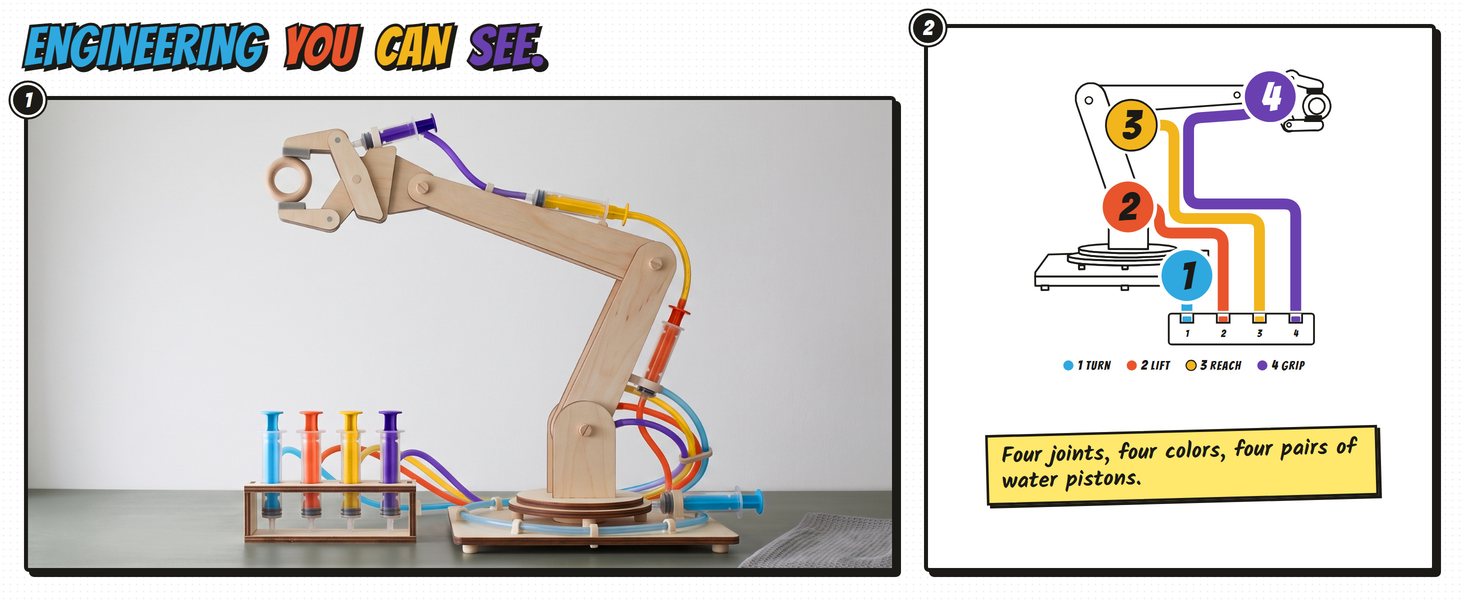
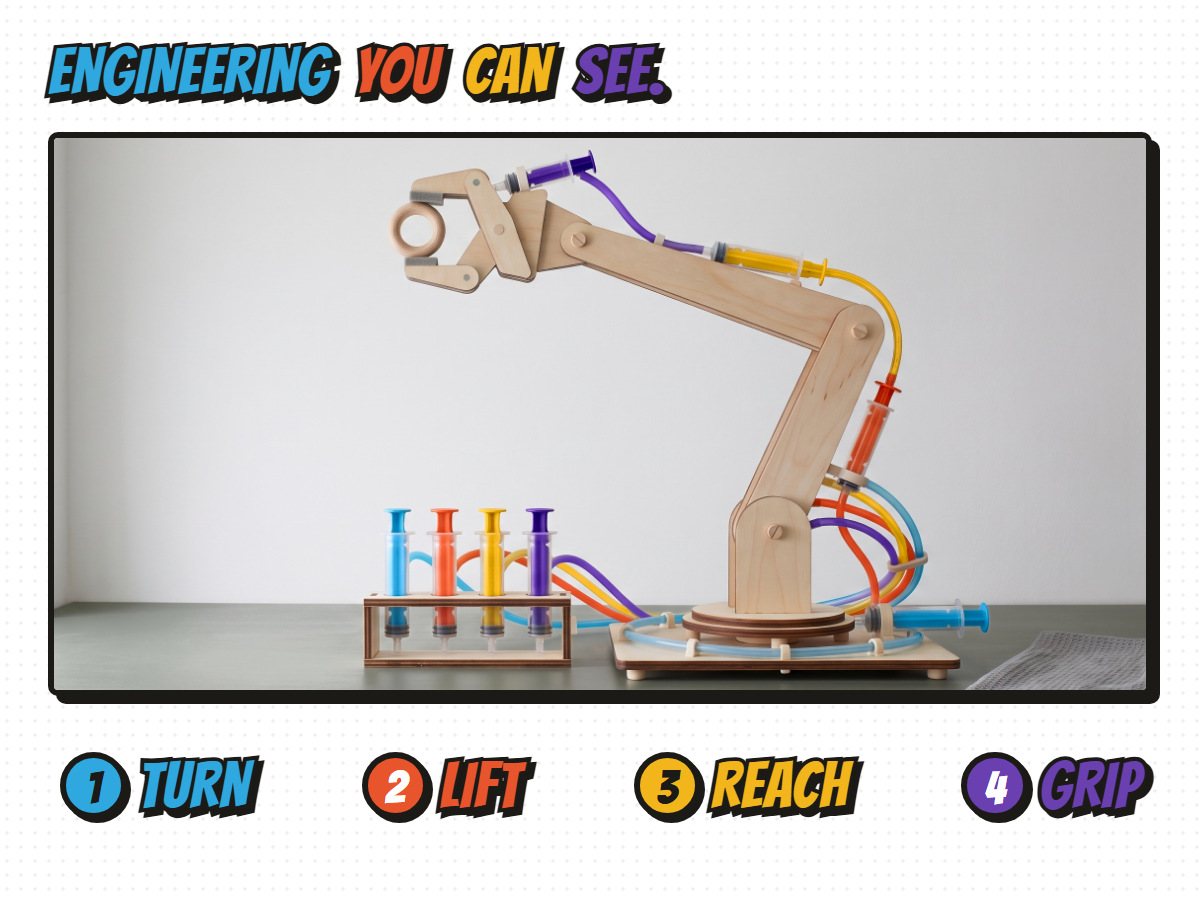
Engineering you can see.
Four joints, four colors, four pairs of water pistons. The same numbers are cut into the rack; the same drawing is inside the lid and in the booklet.
Module 2 · Premium Image & Text

Where the lift comes from.
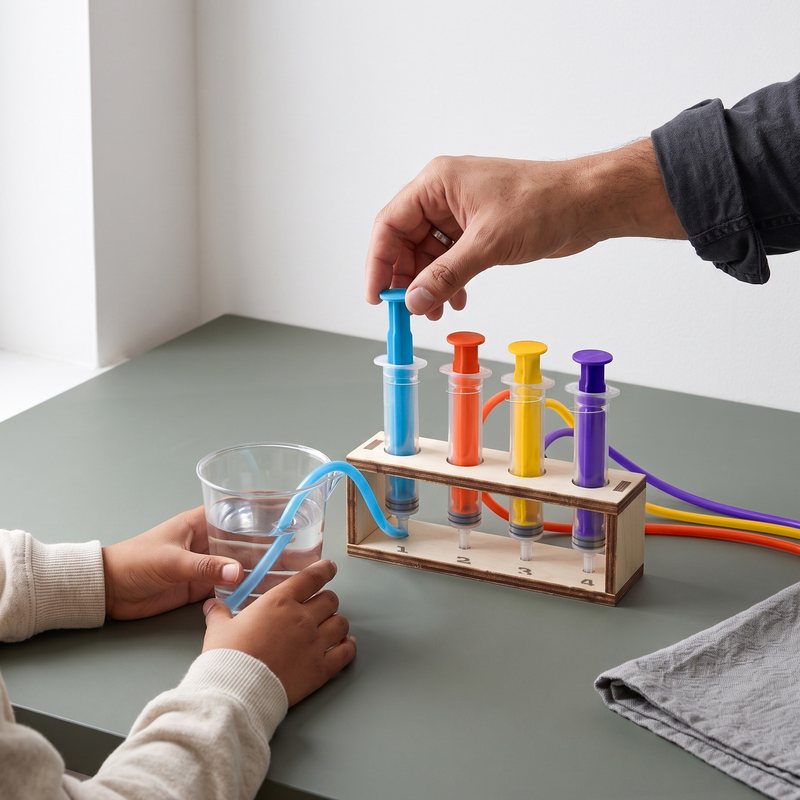
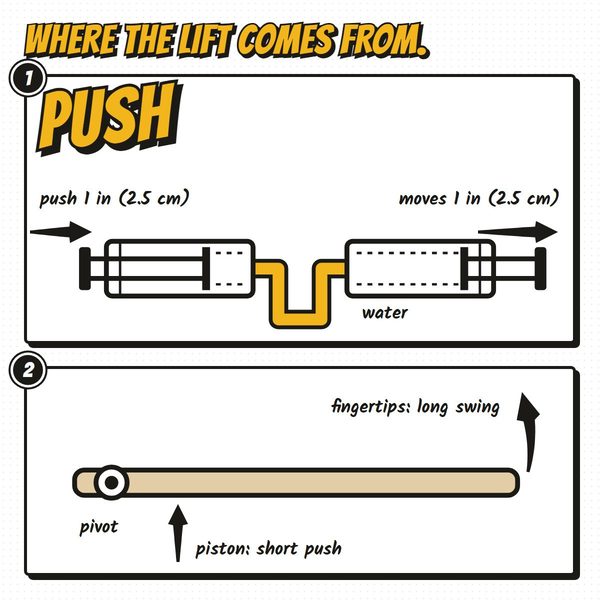
Two pistons of the same size, joined by a tube full of water. Push one plunger in 1 in (2.5 cm) and the other moves out 1 in (2.5 cm): the water does not squash and has nowhere else to go. The push travels along the tube too, less what friction keeps. At every joint the piston pushes close to the pivot and the arm moves far from it. A short push becomes a long swing, and the force at the fingertips is smaller than at the piston. That is why a stroke of about 2.4 in (6 cm) swings the fingertips through a long arc, and why it lifts more at mid-reach than at full reach. The gripper is a scissor pair, the smallest lever of the four; the foam pads give the fingers their hold. Challenge card 10 asks the builder to measure what it lifts: the kit's cylinder, a kitchen scale, five tries, at mid-reach and at full reach.
Module 3 · Premium Four Images & Text
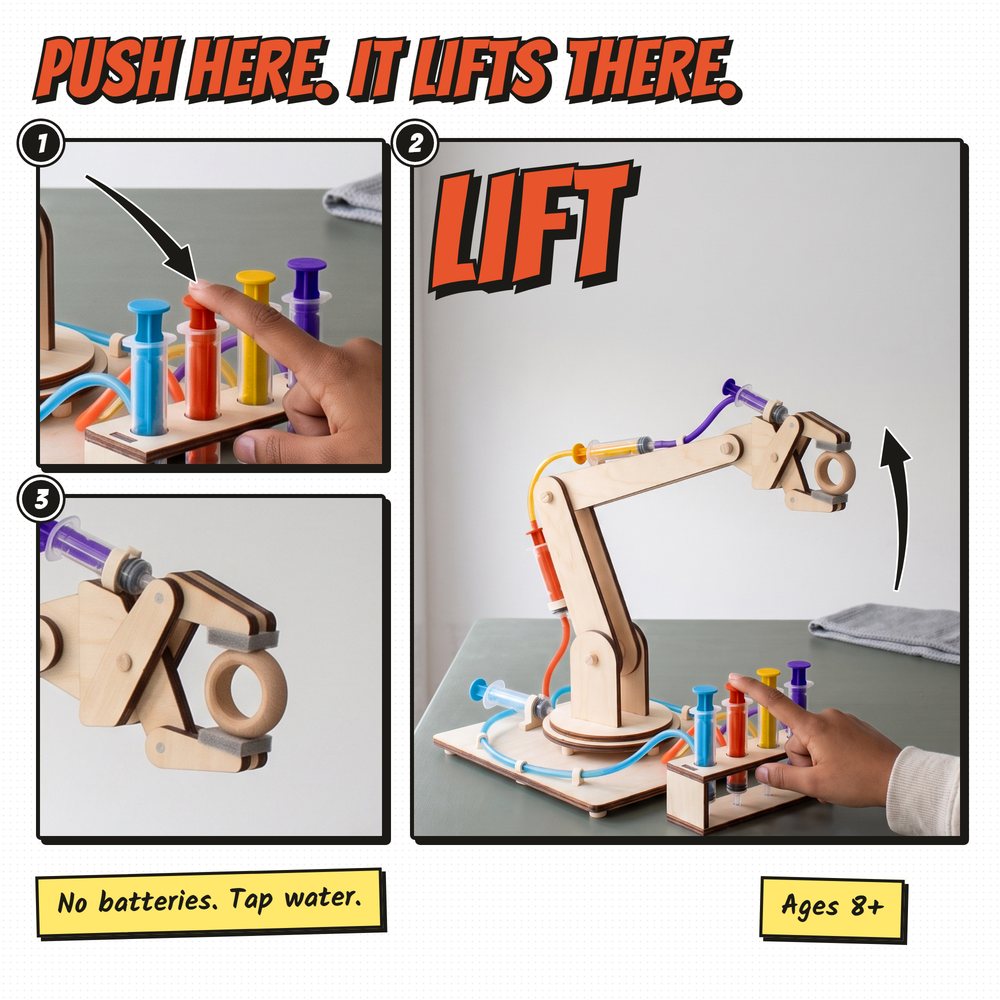
Four lines, four movements.

1 Turn
The sky line. The base turns 180 degrees on its turntable.
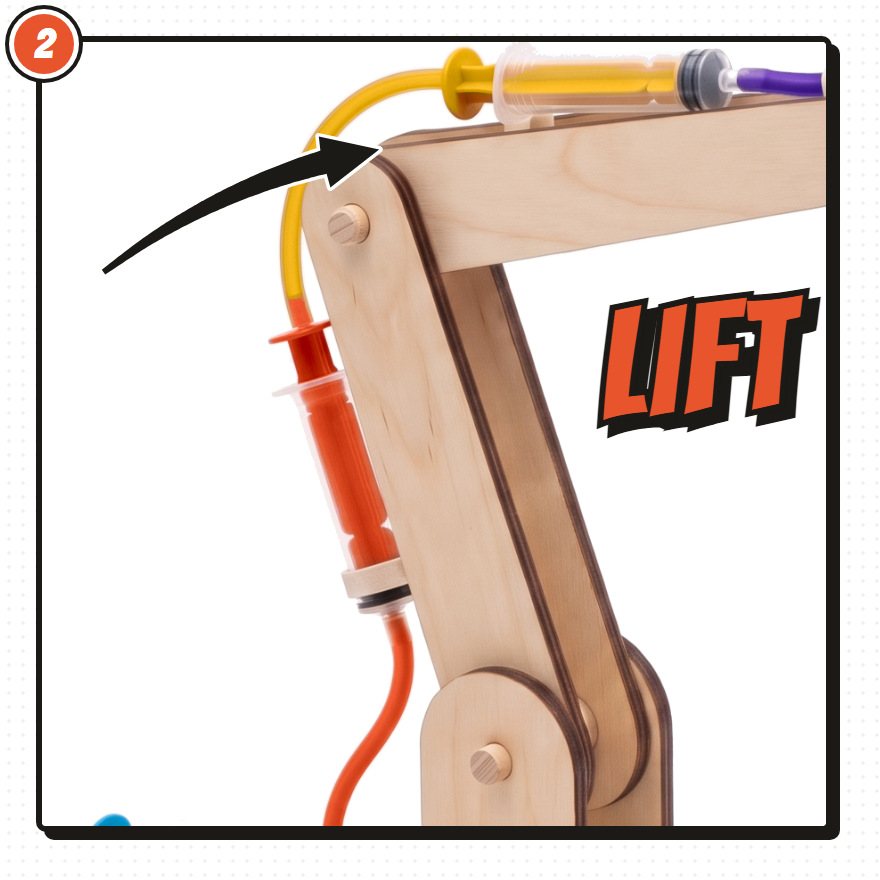
2 Lift
The poppy line. The shoulder raises the boom about 60 degrees.

3 Reach
The sun line. The elbow swings the forearm about 90 degrees; reach about 15 in (38 cm).

4 Grip
The violet line. Two fingers open to 2.5 in (6.4 cm); foam pads hold the ring.
Module 4 · Premium Full Image


Fill to the brim. No bubbles.
A drip at a tip: push the tube on wet and straight, then clip it. The base turns one way and not back: bleed line 1 again. A stiff joint: a wipe of wax on the pivot.
Module 5 · Premium Image & Text

What is printed on the box.
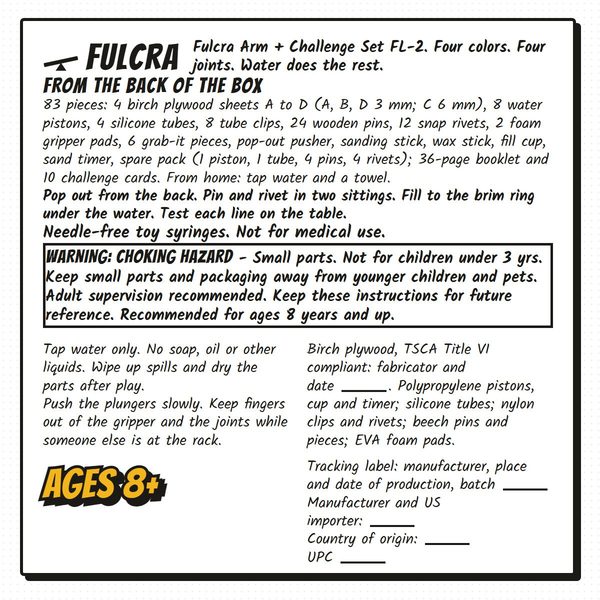
WARNING: CHOKING HAZARD - Small parts. Not for children under 3 yrs. Keep small parts and packaging away from younger children and pets. Adult supervision recommended. Keep these instructions for future reference. Recommended for ages 8 years and up. Needle-free toy syringes. Not for medical use. Tap water only. No soap, oil or other liquids. Wipe up spills and dry the parts after play. Push the plungers slowly. Keep fingers out of the gripper and the joints while someone else is at the rack.
Module 6 · Premium Comparison Chart
Three kits, one map.
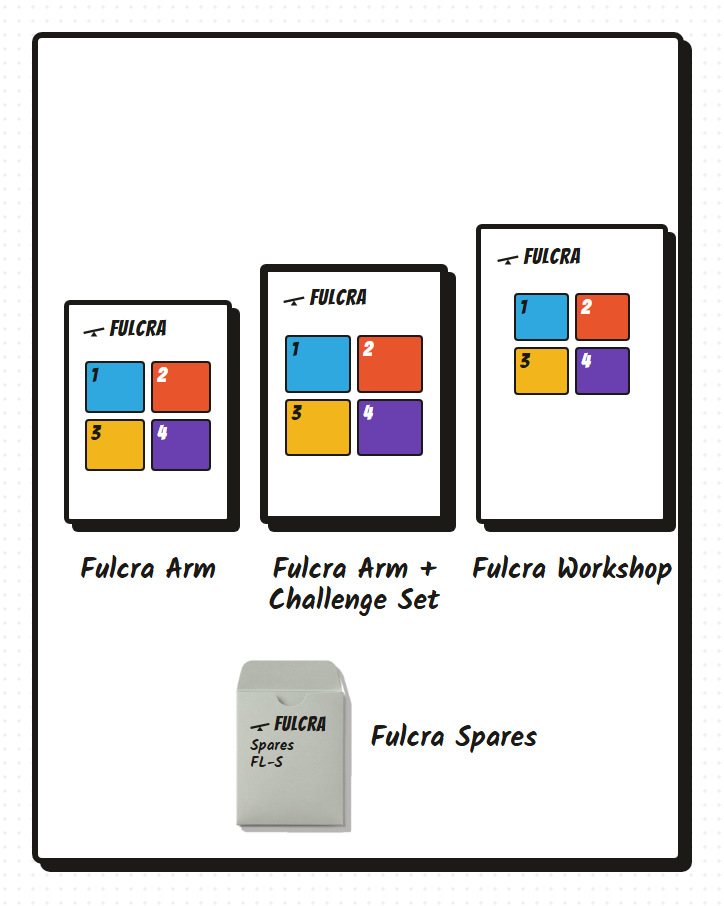
Three kits, one map. Arm: the arm and the lid map; bring your own cup. Arm + Challenge Set: the spare pack, the fill cup, the grab-it pieces, the sand timer and the ten cards. Workshop: the Challenge Set plus two more sheets and two more lines for an excavator or a scissor lift, one at a time.
 Fulcra Arm |  Fulcra Arm + Challenge Set |  Fulcra Workshop | |
|---|---|---|---|
| Sheets | 4 (A to D) | 4 (A to D) | 6 (A to F) |
| Water pistons and lines | 8 and 4 | 8 and 4 | 12 and 6 |
| Spare pack | none | piston, tube, 4 pins, 4 rivets | piston, tube, 4 pins, 4 rivets |
| Fill cup | no (any cup) | yes | yes |
| Grab-it pieces and sand timer | none | 6 and 1 | 6 and 1 |
| Challenge cards | none | 10 | 10 |
| Map inside the lid | yes | yes | yes |
| Tray | plain | coated tray: holds the rack and the cup, catches drips | coated tray and a storage tray |
| Makes | the arm | the arm | the arm, an excavator or a scissor lift, one at a time |
| At the table | two sittings | two sittings | two sittings per machine |
Swipe to compare
Module 7 · Premium Q&A
Before you build.
Which control moves which part?
Each rack slot is numbered 1 to 4 and colored: 1 sky turns the base, 2 poppy lifts the boom, 3 sun swings the forearm, 4 violet closes the gripper. The same numbers are on the sheets, and the same drawing is inside the box lid.
How do we fill it without air in the lines?
Under the water, to the brim ring. Hook the tube end under the cup's lip, draw the rack piston to its ring, tip the pair up and push the bubble out, then fit the joint piston with its plunger all the way in. Test on the table: push the rack plunger all the way in; if the joint stops short, there is still air, so repeat the second step. The booklet shows it in four pictures.
It leaks at one tube. What now?
A drip at a tip means the tube is not on fully. Pull it off, wet the tip, push the tube on straight to the stop and close the clip. The box tray catches drips while you work.
Can an 8-year-old build it alone?
Ages 8+. The build is two sittings: the base and the arm, then the pistons, tubes, fill and test. Adult help recommended for the first build: steps 14 and 31 to 34 (pressing rivets and fitting tubes) carry a hand mark.
How much does it lift?
The ring, the cube, the cylinder and an empty paper cup, yes; a clementine at mid-reach, yes; a full mug, no. It lifts more at mid-reach than at full reach, because the arm is a lever. Card 10 asks the builder to measure it: the kit's own cylinder on a kitchen scale, five tries, lines filled and bled, on a level table.
What else do we need?
Tap water and a towel. No batteries, no glue, no screwdriver: the pusher, the sanding stick and the wax stick are in the box, and so is the fill cup.
Are these pharmacy syringes?
No. They are needle-free water pistons made for the kit: 10 ml, a plain tip, a molded brim ring, no scale and no print, with colored plungers. Use them with tap water only.
A part broke or is missing. What do we do?
The box holds a spare piston, a spare tube, four pins and four rivets. The parts under most strain, the boom and the gripper fingers, are cut from the 6 mm sheet. For anything else, write to the address in the booklet; the Fulcra Spares pack is sold separately.
What wood is it?
3 mm and 6 mm birch plywood, laser-cut and unfinished; the box carries the TSCA Title VI label. Pop parts out from the back with the pusher, never by bending, and wipe spills so the sheets stay flat. About 94 pop-out parts on the four sheets; the 83 pieces in the box count each sheet once.
Product description
Fulcra is a hydraulic robotic arm you build from four sheets of laser-cut birch plywood and drive with water: eight needle-free water pistons on four color-coded lines move four joints. Push the rack piston in 1 in (2.5 cm) and the arm piston moves out 1 in (2.5 cm); the lines are numbered 1 to 4 on the rack and on the sheets, and the same control map is printed inside the box lid, in the booklet and on every challenge card. Fill the lines under the water from the fill cup, to the brim ring, and test each line on the table before it goes on the arm. Reach about 15 in (38 cm); the base turns 180 degrees; the gripper opens to 2.5 in (6.4 cm). Two sittings; adult help recommended for the first build.
In the box (83 pieces): sheet A, sheet B, sheet C and sheet D of birch plywood (sheet C is 6 mm for the boom and the gripper fingers), 8 water pistons, 4 silicone tubes, 8 tube clips, 24 wooden pins, 12 snap rivets, 2 foam gripper pads, 6 grab-it pieces, a pop-out pusher, a sanding stick, a wax stick, a fill cup, a sand timer, a spare piston, a spare tube, 4 spare pins and 4 spare rivets; a 36-page booklet and 10 challenge cards (not counted); the box tray holds the rack and the cup and catches drips. About 94 pop-out parts on the four sheets. You add tap water and a towel.
Needle-free toy syringes. Not for medical use. Tested to ASTM F963-23 by a CPSC-accepted laboratory; Children's Product Certificate available. Birch plywood, TSCA Title VI compliant.
WARNING: CHOKING HAZARD - Small parts. Not for children under 3 yrs.
Keep small parts and packaging away from younger children and pets. Adult supervision recommended. Keep these instructions for future reference.
Recommended for ages 8 years and up.
Description · 1,726 of 2,000 charactersMaterials
Sheets: birch plywood, laser-cut, unfinished; A, B and D 3 mm, C 6 mm for the boom, forearm and gripper fingers; TSCA Title VI label on the box. Water pistons: polypropylene, needle-free slip tip, molded brim ring, silicone double-acting seal, no scale, no print; plunger and thumb-cap colored through, two per color. Tubes: tinted silicone, pigment in the compound. Pins: birch dowel. Rivets and clips: nylon, clips in one plain color. Pads: EVA foam. Grab-it pieces and pusher: solid beech, unfinished. Sanding stick: abrasive paper on a wooden stick. Wax stick: plain paraffin. Cup and timer: polypropylene. Box: printed board; molded pulp tray with a thin coating.
How to use
1. Check the parts against the sheet map on page 2: sheet A, sheet B, sheet C, sheet D, 8 water pistons, 4 tubes, 8 clips, 24 pins, 12 rivets. 2. Pop parts out from the back with the pop-out pusher, never by bending; sand the tab stubs with the sanding stick. 3. Sitting 1, steps 1 to 24: base plate and turntable (sheet A), tower and shoulder (sheet B), boom, forearm and gripper (sheet C); press the snap rivets with a thumb and wipe the pivots with the wax stick. 4. Sitting 2, steps 25 to 40: the rack (sheet D); seat a piston in each rack slot and at each joint; route each tube on its marked side and close the clips. 5. Fill each line under the water: hook the tube end under the lip of the fill cup, draw the rack piston to its brim ring, tip the pair up and tap the air out, fit the joint piston with its plunger all the way in, then push the rack plunger all the way in; if the joint stops short there is air, so repeat. 6. Adult help recommended for the first build: steps 14 (tower rivets) and 31 to 34 (tubes onto the piston tips) carry a hand mark. 7. No screwdriver is needed; the pop-out pusher, sanding stick and wax stick go back in the box tray with the rack and the fill cup. 8. After play push the plungers in, wipe the arm and let the pistons and tubes dry in the tray.
Safety warning
WARNING: CHOKING HAZARD - Small parts. Not for children under 3 yrs. Keep small parts and packaging away from younger children and pets. Adult supervision recommended. Keep these instructions for future reference. Recommended for ages 8 years and up. Needle-free toy syringes. Not for medical use. Tap water only. No soap, oil or other liquids. Wipe up spills and dry the parts after play. Push the plungers slowly. Keep fingers out of the gripper and the joints while someone else is at the rack.